The Technical Side
The arena is represented by a
single mesh, as are the characters and the spells. In
fact, the character and spell controllers are perfect for the
combat sequences here. You need to tweak only a few things to make those
controllers
work for you.
Only the attack and spell
ranges need reworking. Characters are allowed to attack
any other character, regardless of the distance between them. Similarly, spells
are
allowed to target any character, regardless of the distance between the target
character
and the spell caster.
To handle the differences in
distances, you alter the master character and master
spell data. Characters need a very high attack range, so you’ll need to run the
Master Character List Editor and increase the attack range for each character.
Following snap shows one such character’s Attack Range being set to 1,024.
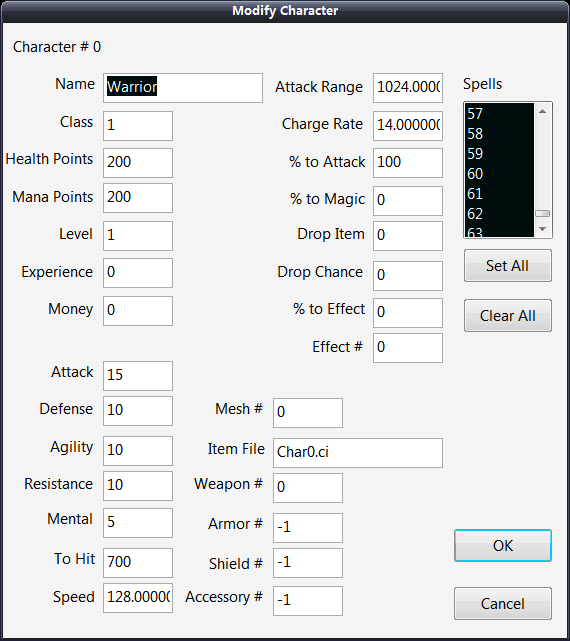 |
Each character’s Attack Range setting in the
MCL Editor should be high enough that all
characters in the battle can hit each other,
regardless of the distance between them. |
As for the spells, the Master
Spell List Editor is where you’ll want to go to increase
the maximum distance of each spell. In Following snap, you’ll see one such spell
in
which I increased the Max. Distance value to 1,024.
 |
The MSL
Editor enables you to adjust the
range of a spell. Be sure to set the Max.
Distance to a high level, such as the range
in this figure. |
In addition to setting
appropriate distances, you need to alter each character’s AI
settings when using the character controller. In combat sequences, you must
force
characters to stand in place using a CHAR_STAND AI setting; otherwise, they’ll
just wander
around the combat level and possibly get lost! If you do let your characters
walk around the level, it’s best to use the route-walking AI setting (CHAR_ROUTE)
to
ensure that the characters walk specifically along the route you want.
Developing
the Combat Sequence
What better way to learn how
to create your own combat sequence than to follow
by example.
Your combat engine adds
characters to the fray using
the character controller’s add_char function, collects and processes the
player’s actions, and
updates the characters accordingly.
class cApp : public cFramework
{
private:
cCamera m_camera;
cTextWindow m_char_stats; // text window for HP/MP stats
cTextWindow m_spell_options; // text window for spells
cInput m_input;
cInputDevice m_keyboard;
cInputDevice m_mouse;
cMesh m_terrain_mesh;
cObject m_terrain_obj;
cCharController m_char_controller;
cSpellController m_spell_controller;
ID3DXFont* m_font;
IDirect3DVertexBuffer9* m_target_vb;
IDirect3DTexture9* m_button;
sItem m_mil[1024]; // the master item list
////////////////////////////////////////////////////////////////////////////////
public:
cApp()
{
m_font = NULL;
m_target_vb = NULL;
m_button = NULL;
ZeroMemory(m_mil, sizeof(m_mil));
}
private:
long get_char_at(long x_pos, long y_pos);
public:
bool init();
bool frame();
};
The application class (cApp)
seems fairly small for an ambitious project such as a
combat sequence, but don’t let the size fool you. This project packs a punch!
Remember that the previously developed character and spell controllers do most
of
the work.
The only differences between
these characters and spells and those in previous
examples are the attack and spell ranges. All spell and attack ranges
have been raised to 1,024 in the master lists, so there’s no need to bother
modifying
them in the application class.
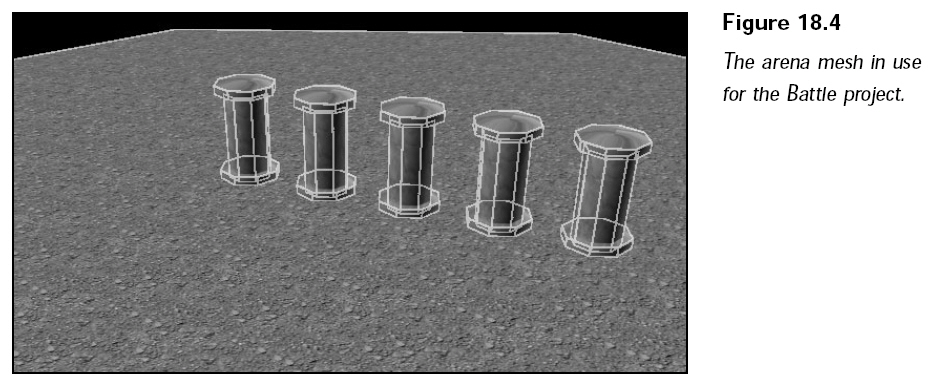
In the Battle project, I
constructed a simple, small mesh for the arena (see Figure
18.4) and loaded it into the m_terrain_mesh and m_terrain_object objects. You do
not
need a node tree because the level meshes typically fit perfectly in the
display.
The combat sequence level meshes don’t have to be large, so when designing your
own levels, keep the meshes just small enough to fit in the display.
The controls are
straightforward. For your character to attack or cast a spell, you
must first select a target character at which to direct the attack or spell.
Selecting a
target character is accomplished by clicking any character in the battle. Two
small triangles
that spin around the target character represent the target (which is contained
within the vertex buffer m_target_vb). The player can target any character at
any time.
When the player is fully
charged (the charge is denoted by a bar that slowly fills up at
the lower-right corner of the screen), he can select the type of action to
perform.
Click Attack to cause the player to strike the selected target (thus damaging
it). Click
Spell to open a list of known spells; clicking a spell casts it at the targeted
character.
Other than the addition of the
targeting mechanism, there’s really nothing new
here. So why not breeze through the application code at this point?