In this article, I will attempt to explain how to construct the view matrix correctly and how to use the view matrix to transform a model’s vertices into clip-space. I will also try to explain how to compute the camera’s position in world space (also called the Eye position) from the view matrix.
Introduction
Understanding how the view matrix works in 3D space is one of the most underestimated concepts of 3D game programming. The reason for this is the abstract nature of this elusive matrix. The world transformation matrix is the matrix that determines the position and orientation of an object in 3D space. The view matrix is used to transform a model’s vertices from world-space to view-space. Don’t be mistaken and think that these two things are the same thing!
You can think of it like this:
Imagine you are holding a video camera, taking a picture of a car. You can get a different view of the car by moving your camera around it and it appears that the scene is moving when you view the image through your camera’s view finder. In a computer program the camera doesn’t move at all and in actuality, the world is just moving in the opposite direction and orientation of how you would want the camera to move in reality.
In order to understand this correctly, we must think in terms of two different things:
- The Camera Transformation Matrix: The transformation that places the camera in the correct position and orientation in world space (this is the transformation that you would apply to a 3D model of the camera if you wanted to represent it in the scene).
- The View Matrix: This matrix will transform vertices from world-space to view-space. This matrix is the inverse of the camera’s transformation matrix described above.
In the image above, the camera’s world transform is shown in the left pane and the view from the camera is shown on the right.
Convention
In this article I will consider matrices to be column major. That is, in a 4×4 homogeneous transformation matrix, column 1 represents the “right” ( ) vector, column 2 represents the “up” (
 ), column 3 represents the “forward” (
 ) vector and column 4 represents the translation (origin or position) of the space represented by the transformation matrix (
 ).
).
Using this convention, we must pre-multiply column vectors to transform a vector by a transformation matrix. That is, in order to transform a vector  by a transformation matrix
  we would need to pre-multiply the column vector by the matrix on the left.
And to concatenate a set of affine transformations (such translation ( ), scale (
 ), and rotation
  )) we must apply the transformations from left to right:
This transformation can be stated in words as “first translate, then rotate, then scale”.
And to transform a child node in a scene graph by the transform of it’s parent you would pre-multiply the child’s local (relative to it’s parent) transformation matrix by it’s parents world transform on the left:
Of course, if the node in the scene graph does not have a parent (the root node of the scene graph) then the node’s world transform is the same as its local (relative to its parent which in this case is just the identity matrix) transform:
Memory Layout of Column-Major Matrices
Using column matrices, the memory layout of the components in computer memory of a matrix are sequential in the columns of the matrix:
This has the annoying consequence that if we want to initialize the values of a matrix we must actually transpose the values in order to load the matrix correctly.
For example, the following layout is the correct way to load a column-major matrix in a C program:
Loading a matrix in column-major order.1 2 3 4 5 6 7 8 9 10 11 | float right[4] = { 1, 0, 0, 0 };
float up[4] = { 0, 1, 0, 0 };
float forward[4] = { 0, 0, 1, 0 };
float position[4] = { 0, 0, 0, 1 };
float matrix[4][4] = {
{ right[0], right[1], right[2], right[3] }, // First column
{ up[0], up[1], up[2], up[3] }, // Second column
{ forward[0], forward[1], forward[2], forward[3] }, // Third column
{position[0], position[1], position[2], position[3] } // Forth column
};
|
At first glance, you will be thinking “wait a minute, that matrix is expressed in row-major format!”. Yes, this is actually true. A row-major matrix stores it’s elements in the same order in memory except the individual vectors are considered rows instead of columns.
So what is the big difference then? The difference is seen in the functions which perform matrix multiplication. Let’s see an example.
Suppose we have the following C++ definitions:
Types1 2 3 4 5 6 7 8 9 10 11 12 13 14 15 16 17 18 19 20 21 22 23 24 25 26 27 28 29 30 31 32 33 34 35 36 37 38 39 40 41 42 43 44 45 46 47 48 49 50 51 52 53 54 55 56 57 | struct vec4
{
float values[4];
vec4()
{
values[0] = values[1] = values[2] = values[3] = 0;
}
vec4( float x, float y, float z, float w )
{
values[0] = x;
values[1] = y;
values[2] = z;
values[3] = w;
}
// Provide array-like index operators for the vector components.
const float& operator[] ( int index ) const
{
return values[index];
}
float& operator[] ( int index )
{
return values[index];
}
};
struct mat4
{
vec4 columns[4];
mat4()
{
columns[0] = vec4( 1, 0, 0, 0 );
columns[1] = vec4( 0, 1, 0, 0 );
columns[2] = vec4( 0, 0, 1, 0 );
columns[3] = vec4( 0, 0, 0, 1 );
}
mat4( vec4 x, vec4 y, vec4 z, vec4 w )
{
columns[0] = x;
columns[1] = y;
columns[2] = z;
columns[3] = w;
}
// Provide array-like index operators for the columns of the matrix.
const vec4& operator[]( int index ) const
{
return columns[index];
}
vec4& operator[]( int index )
{
return columns[index];
}
};
|
The vec4 struct provides the index operator to allow for the use of indices to access the individual vector components. This will make the code slightly easier to read. It is interesting to note that the vec4 structure could be interpreted as either a row-vector or a column-vector. There is no way to differentiate the difference in this context.
The mat4 struct provides the index operator to allow for the use of indices to access the individual columns (not rows!) of the matrix.
Using this technique, in order to access the  row and the
  column of matrix we would need to access the elements of the matrix like this:
main.cpp1 2 3 4 5 6 | int i = row;
int j = column;
mat4 M;
// Access the i-th row and the j-th column of matrix M
float m_ij = M[j][i];
|
This is quite annoying that we have to swap the  and
and  indices in order to access the correct matrix element. This is probably a good reason to use row-major matrices instead of column-major matrices when programming however the most common convention in linear algebra textbooks and academic research papers is to use column-major matrices. So the preference to use column-major matrices is mostly for historical reasons.
Suppose now that we define the following functions:
Matrix-vector multiplication1 2 3 4 5 6 | // Pre-multiply a vector by a multiplying a matrix on the left.
vec4 operator*( const mat4& m, const vec4& v );
// Post-multiply a vector by multiplying a matrix on the right.
vec4 operator*( const vec4& v, const mat4& m );
// Matrix multiplication
mat4 operator*( const mat4& m1, const mat4& m2 );
|
The first method performs pre-multiplication of 4-component column vector with a 4×4 matrix. The second method performs post-multiplication of a 4-component row vector with a 4×4 matrix.
And the third method performs 4×4 matrix-matrix multiplication.
Then the pre-multiply method would look like this:
Pre-multiply vector by a matrix on the left.1 2 3 4 5 6 7 8 9 10 | // Pre-multiply a vector by a matrix on the left.
vec4 operator*( const mat4& m, const vec4& v )
{
return vec4(
m[0][0] * v[0] + m[1][0] * v[1] + m[2][0] * v[2] + m[3][0] * v[3],
m[0][1] * v[0] + m[1][1] * v[1] + m[2][1] * v[2] + m[3][1] * v[3],
m[0][2] * v[0] + m[1][2] * v[1] + m[2][2] * v[2] + m[3][2] * v[3],
m[0][3] * v[0] + m[1][3] * v[1] + m[2][3] * v[2] + m[3][3] * v[3]
);
}
|
Notice that we still multiply the rows of matrix m with the column vector v but the indices of m simply appear swapped.
And similarly the function which takes a 4-component row-vector v and pre-multiplies it by a 4×4 matrix m.
Post-multiply a vector by a matrix on the right.1 2 3 4 5 6 7 8 9 10 | // Pre-multiply a vector by a matrix on the right.
vec4 operator*( const vec4& v, const mat4& m )
{
return vec4(
v[0] * m[0][0] + v[1] * m[0][1] + v[2] * m[0][2] + v[3] * m[0][3],
v[0] * m[1][0] + v[1] * m[1][1] + v[2] * m[1][2] + v[3] * m[1][3],
v[0] * m[2][0] + v[1] * m[2][1] + v[2] * m[2][2] + v[3] * m[2][3],
v[0] * m[3][0] + v[1] * m[3][1] + v[2] * m[3][2] + v[3] * m[3][3]
);
}
|
In this case we multiply the row vector v by the columns of matrix m. Notice that we still need to swap the indices to access the correct column and row of matrix m.
And the final function which performs a matrix-matrix multiply:
Matrix-matrix multiply1 2 3 4 5 6 7 8 9 10 11 12 13 14 15 16 17 18 19 20 21 22 23 24 25 26 27 28 29 30 | // Matrix multiplication
mat4 operator*( const mat4& m1, const mat4& m2 )
{
vec4 X(
m1[0][0] * m2[0][0] + m1[1][0] * m2[0][1] + m1[2][0] * m2[0][2] + m1[3][0] * m2[0][3],
m1[0][1] * m2[0][0] + m1[1][1] * m2[0][1] + m1[2][1] * m2[0][2] + m1[3][1] * m2[0][3],
m1[0][2] * m2[0][0] + m1[1][2] * m2[0][1] + m1[2][2] * m2[0][2] + m1[3][2] * m2[0][3],
m1[0][3] * m2[0][0] + m1[1][3] * m2[0][1] + m1[2][3] * m2[0][2] + m1[3][3] * m2[0][3]
);
vec4 Y(
m1[0][0] * m2[1][0] + m1[1][0] * m2[1][1] + m1[2][0] * m2[1][2] + m1[3][0] * m2[1][3],
m1[0][1] * m2[1][0] + m1[1][1] * m2[1][1] + m1[2][1] * m2[1][2] + m1[3][1] * m2[1][3],
m1[0][2] * m2[1][0] + m1[1][2] * m2[1][1] + m1[2][2] * m2[1][2] + m1[3][2] * m2[1][3],
m1[0][3] * m2[1][0] + m1[1][3] * m2[1][1] + m1[2][3] * m2[1][2] + m1[3][3] * m2[1][3]
);
vec4 Z(
m1[0][0] * m2[2][0] + m1[1][0] * m2[2][1] + m1[2][0] * m2[2][2] + m1[3][0] * m2[2][3],
m1[0][1] * m2[2][0] + m1[1][1] * m2[2][1] + m1[2][1] * m2[2][2] + m1[3][1] * m2[2][3],
m1[0][2] * m2[2][0] + m1[1][2] * m2[2][1] + m1[2][2] * m2[2][2] + m1[3][2] * m2[2][3],
m1[0][3] * m2[2][0] + m1[1][3] * m2[2][1] + m1[2][3] * m2[2][2] + m1[3][3] * m2[2][3]
);
vec4 W(
m1[0][0] * m2[3][0] + m1[1][0] * m2[3][1] + m1[2][0] * m2[3][2] + m1[3][0] * m2[3][3],
m1[0][1] * m2[3][0] + m1[1][1] * m2[3][1] + m1[2][1] * m2[3][2] + m1[3][1] * m2[3][3],
m1[0][2] * m2[3][0] + m1[1][2] * m2[3][1] + m1[2][2] * m2[3][2] + m1[3][2] * m2[3][3],
m1[0][3] * m2[3][0] + m1[1][3] * m2[3][1] + m1[2][3] * m2[3][2] + m1[3][3] * m2[3][3]
);
return mat4( X, Y, Z, W );
}
|
This function multiplies the rows of m1 by the columns of m2. Notice we have to swap the indices in both m1 and m2.
This function can be written slightly simplified if we reuse the pre-multiply function:
Matrix-matrix multiply (simplified)1 2 3 4 5 6 7 8 9 10 | // Matrix multiplication
mat4 operator*( const mat4& m1, const mat4& m2 )
{
vec4 X = m1 * m2[0];
vec4 Y = m1 * m2[1];
vec4 Z = m1 * m2[2];
vec4 W = m1 * m2[3];
return mat4( X, Y, Z, W );
}
|
The main point is that whatever convention you use, you stick with it and be consistent and always make sure you document clearly in your API which convention you are using.
Transformations
When rendering a scene in 3D space, there are usually 3 transformations that are applied to the 3D geometry in the scene:
- World Transform: The world transform (or sometimes referred to as the object transform or model matrix) will transform a models vertices (and normals) from object space (this is the space that the model was created in using a 3D content creation tool like 3D studio max or Maya) into world space. World space is the position, orientation (and sometimes scale) that positions the model in the correct place in the world.
- View Transform: The world space vertex positions (and normals) need to be transformed into a space that is relative to the view of the camera. This is called “view space” (sometimes referred to “camera space”) and is the transformation that will be studied in this article.
- Projection Transform: Vertices that have been transformed into view space need to be transformed by the projection transformation matrix into a space called “clip space”. This is the final space that the graphics programmer needs to worry about. The projection transformation matrix will not be discussed in this article.
If we think of the camera as an object in the scene (like any other object that is placed in the scene) then we can say that even the camera has a transformation matrix that can be used to orient and position it in the scene (the world transform, or in the context of this article, I will refer to this transform as the “camera transform” to differentiate it from the “view transform”). But since we want to render the scene from the view of the camera, we need to find a transformation matrix that will transform the camera into “view space”. In other words, we need a transform matrix that will place the camera object at the origin of the world pointing down the Z-axis (the positive or negative Z-axis depends on whether we are working in a left-handed or right-handed coordinate system. For an explanation on left-handed and right-handed coordinate systems, you can refer to my article titled Coordinate Systems). In other words, we need to find a matrix  such that:

where is the camera transform matrix (or world transform), and is the matrix we are looking for that will transform the camera transform matrix into the identity matrix  .
.
Well, it may be obvious that the matrix is just the inverse of . That is,
Coincidently, The matrix is used to transform any object in the scene from world space into view space (or camera space).
The Camera Transformation
The camera transformation is the transformation matrix that can be used to position and orient an object or a model in the scene that represents the camera. If you wanted to represent several cameras in the scene and you wanted to visualize where each camera was placed in the world, then this transformation would be used to transform the vertices of the model that represents the camera from object-space into world space. This is the same as a world-matrix or model-matrix that positions any model in the scene. This transformation should not be mistaken as the view matrix. It cannot be used directly to transform vertices from world-space into view-space.
To compute the camera’s transformation matrix is no different from computing the transformation matrix of any object placed in the scene.
If represents the orientation of the camera, and represents the translation of the camera in world space, then the camera’s transform matrix can be computed by multiplying the two matrices together.
The View Matrix
The view matrix on the other hand is used to transform vertices from world-space to view-space. This matrix is usually concatenated together with the object’s world matrix and the projection matrix so that vertices can be transformed from object-space directly to clip-space in the vertex program.
If represents the object’s world matrix (or model matrix), and represents the view matrix, and  is the projection matrix, then the concatenated world (or model), view, projection can be represented by
  simply by multiplying the three matrices together:
And a vertex can be transformed to clip-space by multiplying by the combined matrix :
So that’s how it’s used, so how is the view matrix computed? There are several methods to compute the view matrix and the preferred method usually depends on how you intend to use it.
A common method to derive the view matrix is to compute a Look-at matrix given the position of the camera in world space (usually referred to as the “eye” position), an “up” vector (which is usually  ), and a target point in world space.
If you are creating a first-person-shooter, you will probably not use the Look-at method to compute the view matrix. In this case, it would be much more convenient to use a method that computes the view matrix based on a position in world space and pitch and yaw angles (usually we don’t want the camera to roll in a FPS shooter).
If you want to create a camera that can be used to pivot a 3D object around some central pivot point, then you would probably want to create an arcball camera.
I will discuss these 3 typical camera models in the following sections.
Look At Camera
Using this method, we can directly compute the view matrix from the world position of the camera (eye), a global up vector, and a target point (the point we want to look at).
A typical implementation of this function (assuming a right-handed coordinate system which has a camera looking in the  axis) may look something like this:
Look At, right-handed coordinate system.1 2 3 4 5 6 7 8 9 10 11 12 13 14 15 16 17 18 19 20 21 22 23 24 25 26 27 28 29 30 31 | mat4 LookAtRH( vec3 eye, vec3 target, vec3 up )
{
vec3 zaxis = normal(eye - target); // The "forward" vector.
vec3 xaxis = normal(cross(up, zaxis));// The "right" vector.
vec3 yaxis = cross(zaxis, xaxis); // The "up" vector.
// Create a 4x4 orientation matrix from the right, up, and forward vectors
// This is transposed which is equivalent to performing an inverse
// if the matrix is orthonormalized (in this case, it is).
mat4 orientation = {
vec4( xaxis.x, yaxis.x, zaxis.x, 0 ),
vec4( xaxis.y, yaxis.y, zaxis.y, 0 ),
vec4( xaxis.z, yaxis.z, zaxis.z, 0 ),
vec4( 0, 0, 0, 1 )
};
// Create a 4x4 translation matrix.
// The eye position is negated which is equivalent
// to the inverse of the translation matrix.
// T(v)^-1 == T(-v)
mat4 translation = {
vec4( 1, 0, 0, 0 ),
vec4( 0, 1, 0, 0 ),
vec4( 0, 0, 1, 0 ),
vec4(-eye.x, -eye.y, -eye.z, 1 )
};
// Combine the orientation and translation to compute
// the final view matrix
return ( orientation * translation );
}
|
This method can be slightly optimized because we can eliminate the need for the final matrix multiply if we directly compute the translation part of the matrix as shown in the code below.
Optimized look-at, right-handed coordinate system.1 2 3 4 5 6 7 8 9 10 11 12 13 14 15 16 | mat4 LookAtRH( vec3 eye, vec3 target, vec3 up )
{
vec3 zaxis = normal(eye - target); // The "forward" vector.
vec3 xaxis = normal(cross(up, zaxis));// The "right" vector.
vec3 yaxis = cross(zaxis, xaxis); // The "up" vector.
// Create a 4x4 view matrix from the right, up, forward and eye position vectors
mat4 viewMatrix = {
vec4( xaxis.x, yaxis.x, zaxis.x, 0 ),
vec4( xaxis.y, yaxis.y, zaxis.y, 0 ),
vec4( xaxis.z, yaxis.z, zaxis.z, 0 ),
vec4(-dot( xaxis, eye ), -dot( yaxis, eye ), -dot( zaxis, eye ), 1 )
};
return viewMatrix;
}
|
In this case, we can take advantage of the fact that taking the dot product of the x, y, and z axes with the eye position in the 4th column is equivalent to multiplying the orientation and translation matrices directly. The result of the dot product must be negated to account for the “inverse” of the translation part.
A good example of using the gluLookAt function in OpenGL can be found on Nate Robins OpenGL tutor page: http://user.xmission.com/~nate/tutors.html
FPS Camera
If we want to implement an FPS camera, we probably want to compute our view matrix from a set of euler angles (pitch and yaw) and a known world position. The basic theory of this camera model is that we want to build a camera matrix that first translates to some position in world space, then rotates yaw degrees about the Y axis, then rotates pitch degrees about the X axis. Since we want the view matrix, we need to compute the inverse of the matrix.
The function to implement this camera model might look like this:
FPS camera, right-handed coordinate system.1 2 3 4 5 6 7 8 9 10 11 12 13 14 15 16 17 18 19 20 21 22 23 24 25 26 | // Pitch should be in the range of [-90 ... 90] degrees and yaw
// should be in the range of [0 ... 360] degrees.
mat4 FPSViewRH( vec3 eye, float pitch, float yaw )
{
// If the pitch and yaw angles are in degrees,
// they need to be converted to radians. Here
// I assume the values are already converted to radians.
float cosPitch = cos(pitch);
float sinPitch = sin(pitch);
float cosYaw = cos(yaw);
float sinYaw = sin(yaw);
vec3 xaxis = { cosYaw, 0, -sinYaw };
vec3 yaxis = { sinYaw * sinPitch, cosPitch, cosYaw * sinPitch };
vec3 zaxis = { sinYaw * cosPitch, -sinPitch, cosPitch * cosYaw };
// Create a 4x4 view matrix from the right, up, forward and eye position vectors
mat4 viewMatrix = {
vec4( xaxis.x, yaxis.x, zaxis.x, 0 ),
vec4( xaxis.y, yaxis.y, zaxis.y, 0 ),
vec4( xaxis.z, yaxis.z, zaxis.z, 0 ),
vec4( -dot( xaxis, eye ), -dot( yaxis, eye ), -dot( zaxis, eye ), 1 )
};
return viewMatrix;
}
|
In this function we first compute the axes of the view matrix. This is derived from the concatenation of a rotation about the Y axis followed by a rotation about the X axis. Then we build the view matrix the same as before by taking advantage of the fact that the final column of the matrix is just the dot product of the basis vectors with the eye position of the camera.
Arcball Camera
// TODO
Converting between Camera Transformation Matrix and View Matrix
If you only have the camera transformation matrix and you want to compute the view matrix that will correctly transform vertices from world-space to view-space, you only need to take the inverse of the camera transform.
If you only have the view matrix and you need to find a camera transformation matrix that can be used to position a visual representation of the camera in the scene, you can simply take the inverse of the view matrix.
This method is typically used in shaders when you only have access to the view matrix and you want to find out what the position of the camera is in world space. In this case, you can take the 4th column of the inverted view matrix to determine the position of the camera in world space:
Of course it may be advisable to simply pass the eye position of the camera as a variable to your shader instead of inverting the view matrix for every invocation of your vertex shader or fragment shader.
Download the Demo
This OpenGL demo shows an example of how to create an first-person and a look-at view matrix using the techniques shown in this article. I am using the OpenGL Math Library (https://github.com/g-truc/glm) which uses column-major matrices. The demo also shows how to transform primitives correctly using the formula:
Where
- is a translation matrix.
- is a rotation matrix.
- is a (non-uniform) scale matrix.
See line 434 in main.cpp for the construction of the model-view-projection matrix that is used to transform the geometry.
 ViewMatrixDemo.zip
Usage:
Run the ViewMatrixDemo.exe in the bin folder.
- Space: Toggle scale animation.
- Shift: Speed up camera movement.
- W: Move camera forward.
- A: Move camera left.
- S: Move camera backward.
- Q: Move camera upwards.
- E: Move camera downwards.
- LMB: Rotate the camera.
- RMB: Rotate the geometry.
- R: Reset the camera to it’s default position and orientation.
- Esc: Quit the demo.
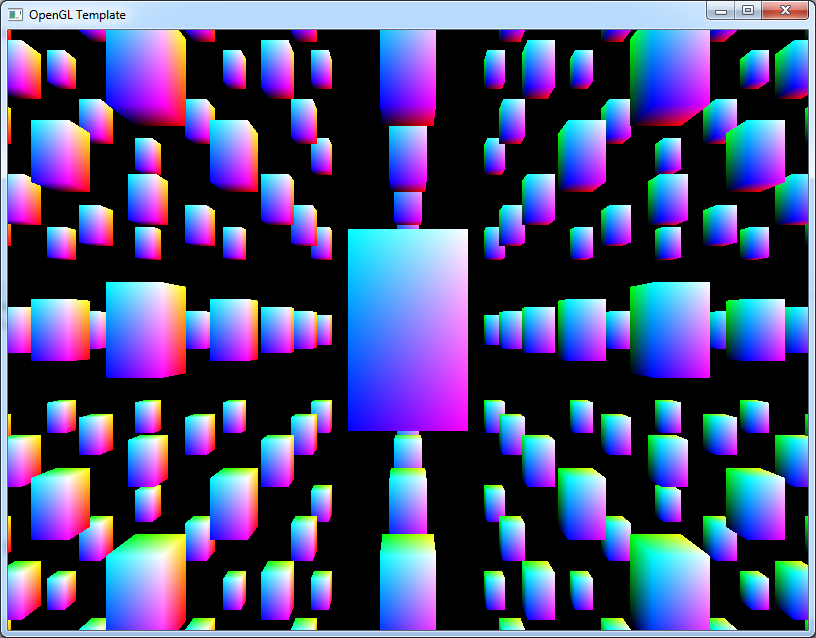
View Matrix Demo
Conclusion
I hope that I have made clear the differences between the camera’s transform matrix and the view matrix and how you can convert between one and the other. It is also very important to be aware of which matrix you are dealing with so that you can correctly obtain the eye position of the camera. When working with the camera’s world transformation, the eye position is the 4th row of the world transform, but if you are working with the view matrix, you must first inverse the matrix before you can extract the eye position in world space.