
2020年3月27日

深度雾可以在后期处理通过深度图反算得到世界坐标, 然后再用位置减去水平面位置,再除雾距得到雾化比进行处理。
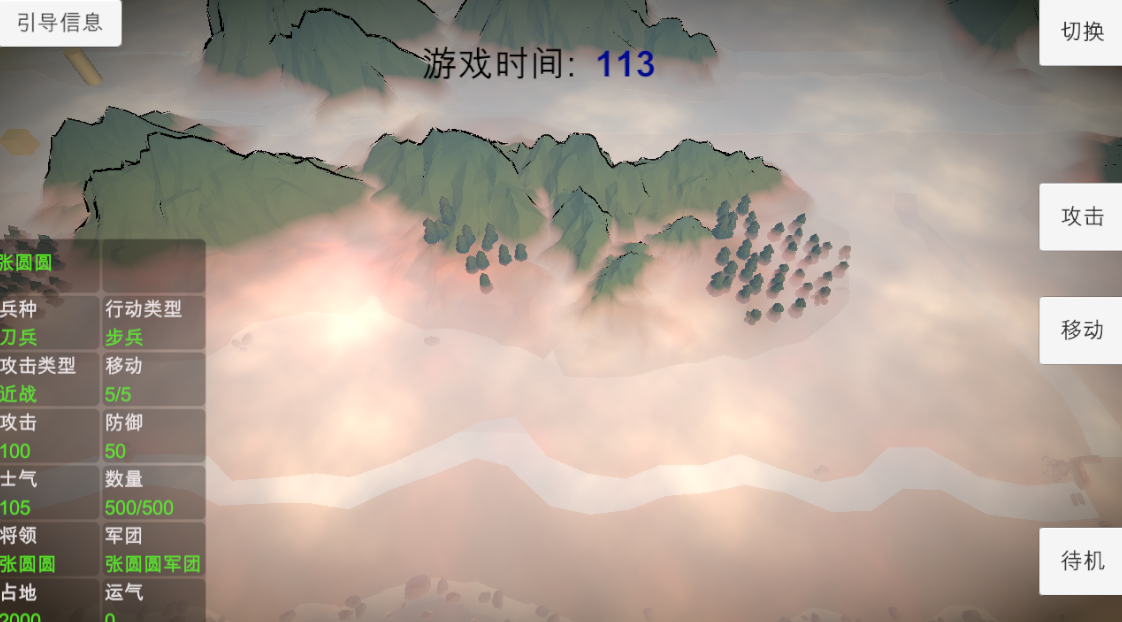
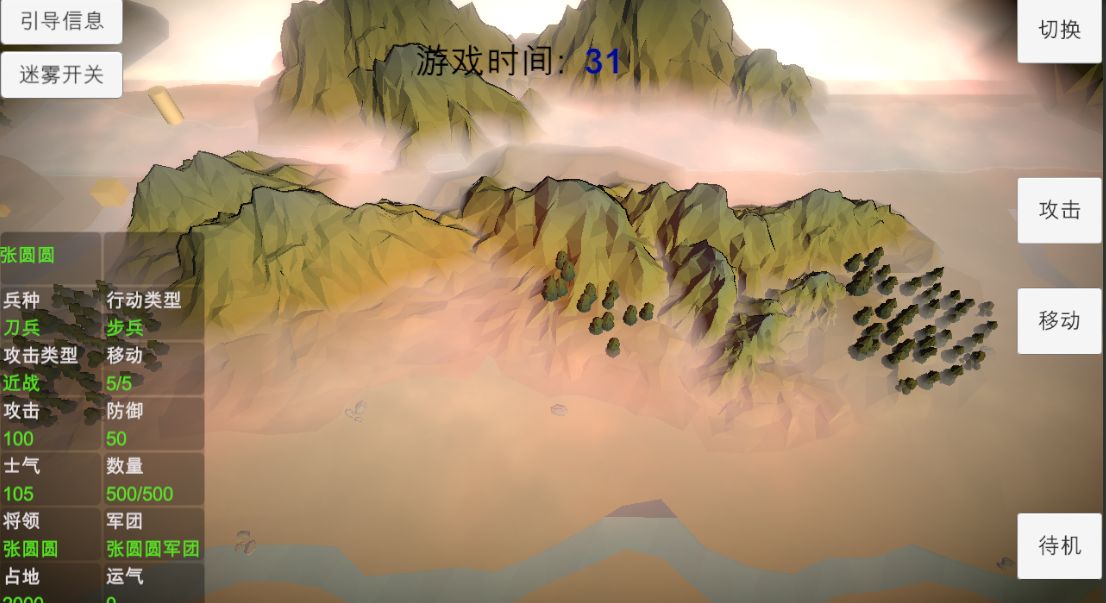
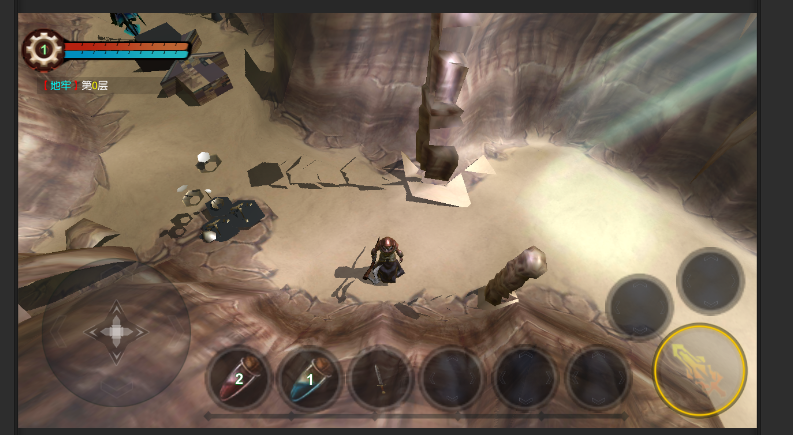
不用后期也可以,直接摆放渲染平面,然后在shader中用当前平面深度减去深度图深度,再除雾距得到雾化比进行处理。上图就是这种方式实现的载图,对应shader如下:
void vertexDataFunc( inout appdata_full v, out Input o )
{
UNITY_INITIALIZE_OUTPUT( Input, o );
UNITY_TRANSFER_DITHER_CROSSFADE( o, v.vertex );
float2 tex_pos;
tex_pos.x = v.vertex.x;
tex_pos.y = v.vertex.z;
float rnd = sin(_Time.y*0.01f) + cos(_Time.y*0.01f)*10;
o.wavecoord = float4(tex_pos + rnd, tex_pos*2.0 + rnd);
}
void surf( Input i , inout SurfaceOutputStandard o )
{
//UNITY_APPLY_DITHER_CROSSFADE(i);
float _ScrollSpeed = 0.7f;
fixed scrollValue = fixed2(_ScrollSpeed * sin(_Time.y), _ScrollSpeed * sin(_Time.y));
fixed4 c = tex2D(_MainTex, i.wavecoord.xy);
o.Albedo = c.rgb * _FogColor.rgb;
o.Emission = _FogColor.rgb;
float4 ase_screenPos = float4( i.screenPos.xyz , i.screenPos.w + 0.00000001 );
float eyeDepth = LinearEyeDepth(UNITY_SAMPLE_DEPTH(tex2Dproj(_CameraDepthTexture,UNITY_PROJ_COORD(ase_screenPos))));
float clampResult = clamp((abs((
eyeDepth
- ase_screenPos.w)) * (0.1f+ _FogIntensity * 0.4f)), 0, _FogMaxIntensity);
o.Alpha = clampResult;
}
另外迷雾太大,无法看清游戏,可以让相机拉远显示迷雾,靠近则让迷雾变淡处理,简单地将_FogMaxIntensity修改下即可:
_FogMaxIntensity = _FogMaxIntensity * pow(ase_screenPos.w * 0.01f, 3);
posted @
2020-03-27 18:07 flipcode 阅读(562) |
评论 (0) |
编辑 收藏
2020年3月26日
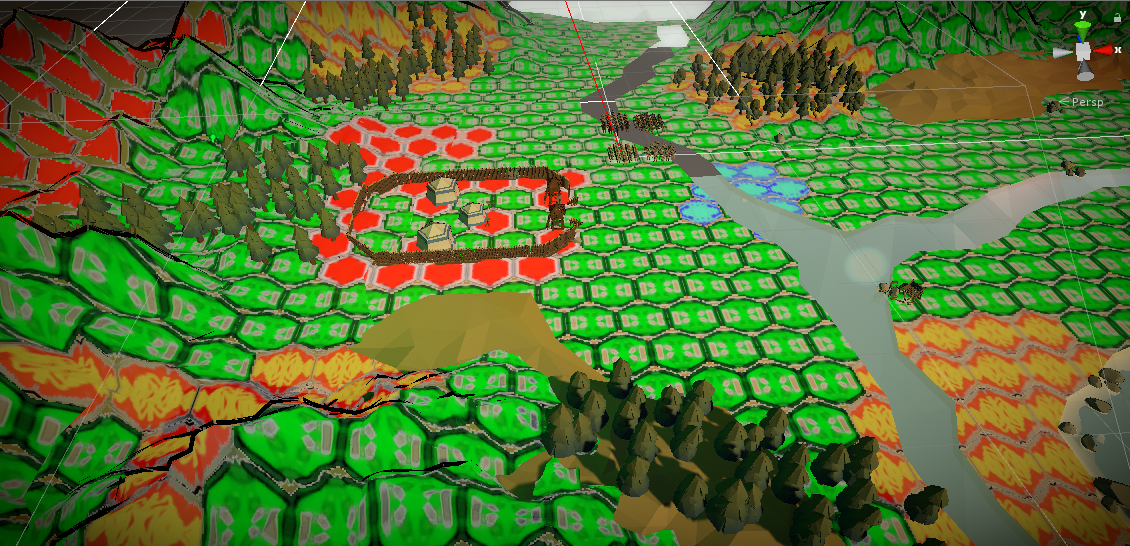
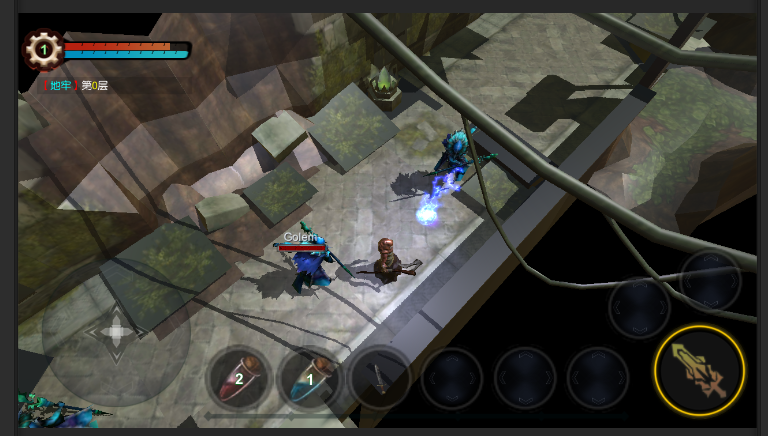
有很多实现方案, 有人会想着用贴花去做,其实很没必要,一种廉价又简单的方式可以实现:将ps当前位置转换到hexagon的uv空间再采样hexagon贴图即可, 即在地表绘制的ps中(或在后处理里),取得(或通过深度求得)世界位置并减去当前位置所在格子中心点的世界位置,得到相对格子的偏移,然后再转为uv坐标。那么hexagon的属性怎么得到?用另一张point贴图在cpu中修改后传入给shader即可(以上图片中所示就是我用的这种方式实现的样例)。
posted @
2020-03-26 20:55 flipcode 阅读(338) |
评论 (0) |
编辑 收藏
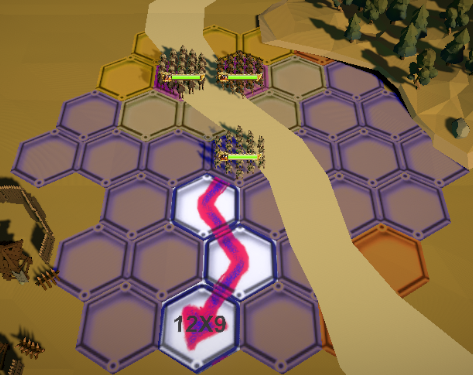
三国志14在寻路时可以显示出所行走路径,思考了下,可以用以下方式做到:
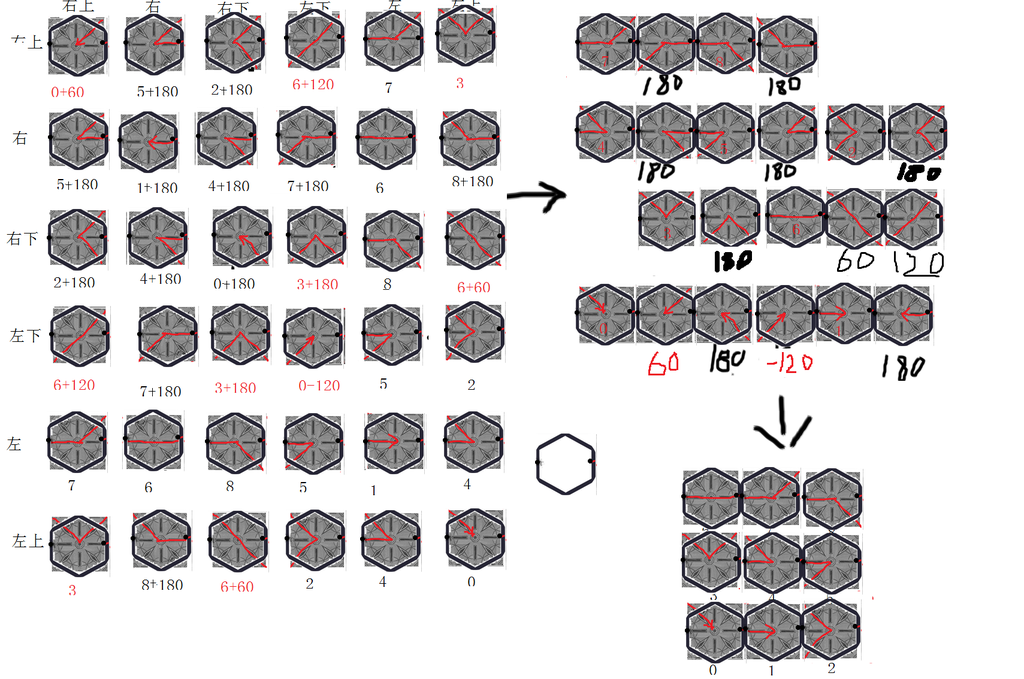
实现方式:
// uv=x,y, rotation = z
public static readonly kPathArrow[,] combineType =
{
// 右上,右上 右, 右下, 左下, 左, 左上
{new kPathArrow(0, 60), new kPathArrow(5, 180), new kPathArrow(2, 180), new kPathArrow(6, 120), new kPathArrow(7, 0), new kPathArrow(3, 0)},
// 右
{new kPathArrow(5, 180), new kPathArrow(1, 180), new kPathArrow(4, 180), new kPathArrow(7, 180), new kPathArrow(6, 0), new kPathArrow(8, 180)},
// 右下
{new kPathArrow(2, 180), new kPathArrow(4, 180), new kPathArrow(0, 180), new kPathArrow(3, 180), new kPathArrow(8, 0), new kPathArrow(6, 60)},
// 左下
{new kPathArrow(6, 120), new kPathArrow(7, 180), new kPathArrow(3, 180), new kPathArrow(0, -120), new kPathArrow(5, 0), new kPathArrow(2, 0)},
// 左
{new kPathArrow(7, 0), new kPathArrow(6, 0), new kPathArrow(8, 0), new kPathArrow(5, 0), new kPathArrow(1, 0), new kPathArrow(4, 0)},
// 左上
{new kPathArrow(3, 0), new kPathArrow(8, 180), new kPathArrow(6, 60), new kPathArrow(2, 0), new kPathArrow(4, 0), new kPathArrow(0, 0)},
};
private Vector3 RotVertex(Vector3 point, float rot)
{
Vector3 pos = point;
float cs = Mathf.Cos(rot);
float sn = Mathf.Sin(rot);
pos.x = point.x * cs + point.z * sn;
pos.z = -point.x * sn + point.z * cs;
return pos;
}
//----------------------------------------------------------------------------------------------
public void AddPathTile(int x, int z, int idx)
{
int enterDir = idx / (int)kHexGrid.HexDirection.MAX;
int outDir = idx % (int)kHexGrid.HexDirection.MAX;
kPathArrow pathArrow = combineType[enterDir, outDir];
int rowUV = pathArrow.idx / 3;
int colUV = pathArrow.idx % 3;
float rot = pathArrow.angle * Mathf.PI/180.0f;
Vector3 center = kHexGrid.ToWorldPos(x, z);
Vector2 centerUV = new Vector2(0.5f, 0.5f);
Vector2 uvStart = new Vector2(colUV * 1 / 3.0f, rowUV * 1 / 3.0f);
for (kHexGrid.HexDirection dir = kHexGrid.HexDirection.NE; dir <= kHexGrid.HexDirection.NW; dir++)
{
Vector3 v1 = center + new Vector3(0,0.01f,0);
Vector3 v2 = kHexGrid.cornerPos[(int)dir] + new Vector3(0, 0.01f, 0);
Vector3 v3 = kHexGrid.cornerPos[(int)dir + 1] + new Vector3(0, 0.01f, 0);
if (rot > 0.0001f || rot < -0.0001f)
{
v2 = RotVertex(v2, rot);
v3 = RotVertex(v3, rot);
}
AddTriangle(v1, center + v2, center + v3,
uvStart + centerUV * 1/3.0f, uvStart + kHexGrid.cornerUV[(int)dir] * 1 / 3.0f, uvStart + kHexGrid.cornerUV[(int)dir + 1] * 1 / 3.0f,
Color.white);
}
}
丑图效果:
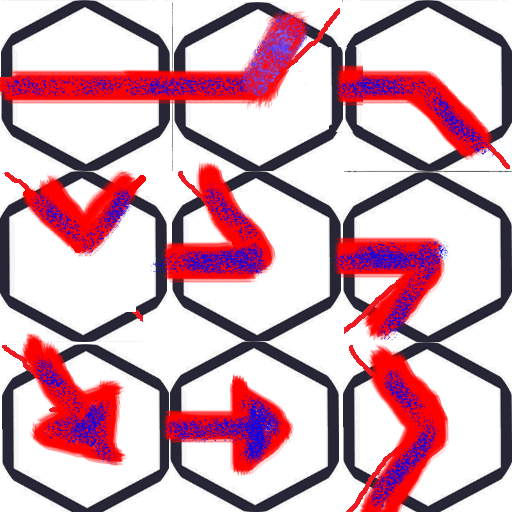
所用贴图
posted @
2020-03-26 20:33 flipcode 阅读(349) |
评论 (0) |
编辑 收藏
2020年1月3日
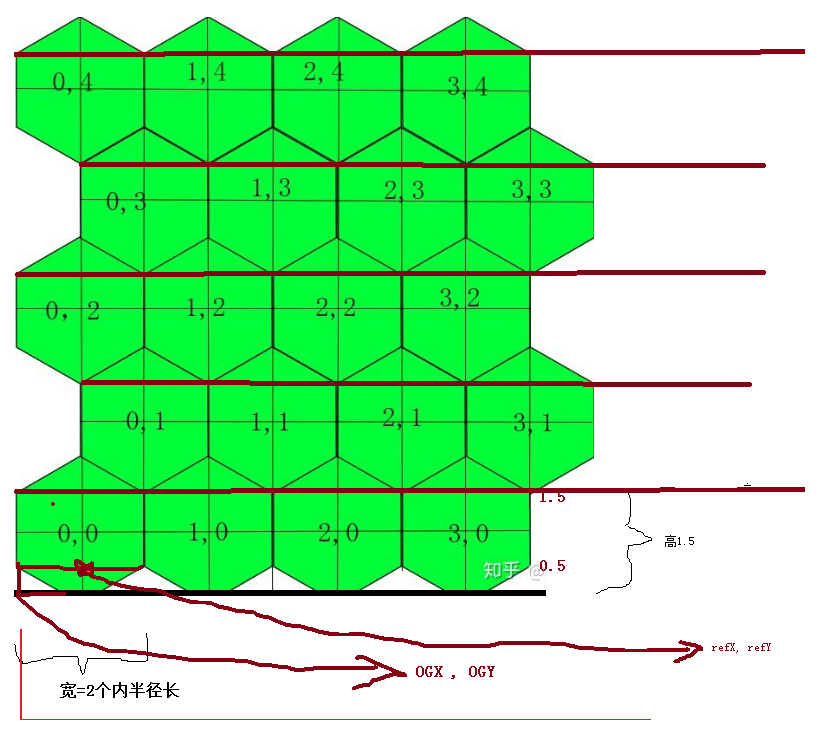
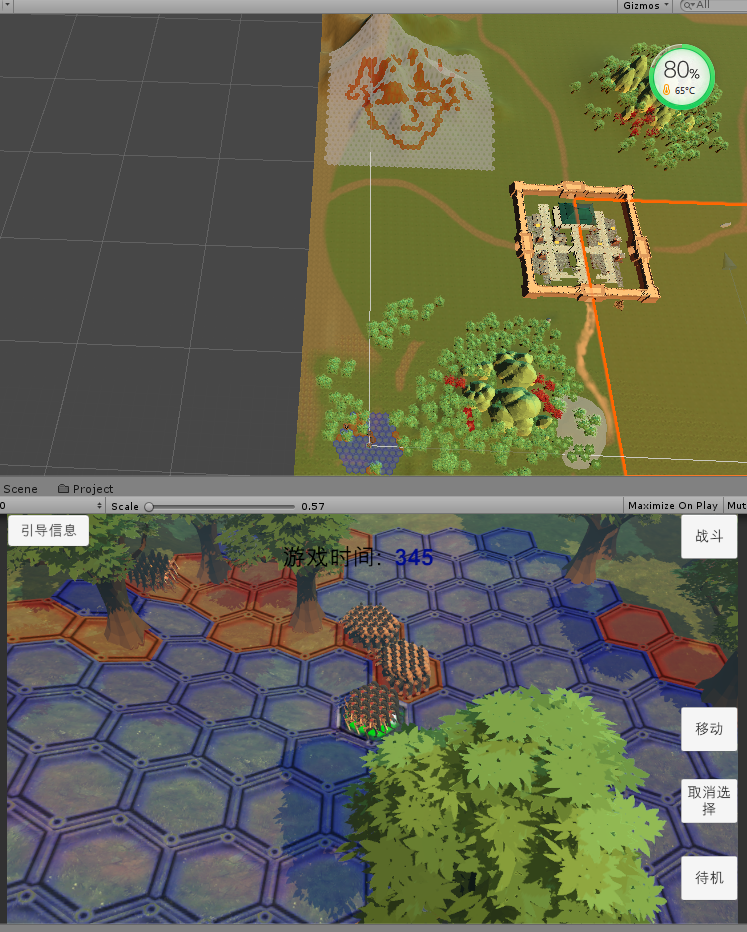
unity slg的方形和六边形测试, 其中主要是坐标转换,下面是我自己想出来的一种比较简便高效的处理方法,实现方法如下:
// 记录下: 这是我看图总结出的比较简便的算法:)(flipcode@qq.com):
// 注意,传入的xWorld要/edgeLength
public static Vector2 ToHexGrid(float xWorld, float yWorld)
{
float edgeLength = 1;
float halfGridWidth = edgeLength * 0.866025404f;
int iGY = (int)(yWorld / (1.5 * edgeLength));
bool odd = ((iGY & 1) != 0);
// 奇:
if (odd)
{
xWorld -= halfGridWidth;
}
int iGX = (int)(xWorld / (2 * halfGridWidth));
// 得到格子左下角坐标:
float OGX = iGX * (2 * halfGridWidth);
float OGY = iGY * (1.5f * edgeLength);
float refX = OGX + halfGridWidth;
float refY = OGY + edgeLength * 0.5f;
// 可能不在本格子内(因为可能位置在格格子下方的左下角或右下角):
bool bOutProbably = yWorld < refY;
if (bOutProbably)
{
// 得到Hex中心往下半个外边长的位置:
float dx = Mathf.Abs(xWorld - refX) * (0.5f * edgeLength / halfGridWidth); // 乘( ../.. )使其变成正方形再来判断
float dy = Mathf.Abs(yWorld - refY);
float dt = dx + dy;
// 在左半边:
if (xWorld < refX)
{
// 不在本格子,而是在左下角:
if (dt > edgeLength * 0.5f)
{
iGY--; // 不管奇偶,下部都要y--
// 如果是偶数的左下,还要将x--
if (false == odd)
{
iGX--;
}
}
}
// 在右半边
else
{
// 不在本格子, 而是在右下角:
if (dt > edgeLength * 0.5f)
{
iGY--; // 不管奇偶,下部都要y--
// 如果是奇数的右下,还要将x++
if (odd)
{
iGX++;
}
}
}
}
return new Vector2(iGX, iGY);
}
public static Vector3 ToWorldPos(int iGX, int iGY)
{
bool odd = ((iGY & 1) != 0);
// 得到格子左下角坐标:
float OGX = iGX * (2 * halfGridWidth);
float OGY = iGY * (1.5f * edgeLength);
// 奇数行要右移半个宽度:
if (odd)
{
OGX += halfGridWidth;
}
// 偏移转到格子中心位置:
Vector3 pos = new Vector3(OGX + halfGridWidth, 0, OGY + edgeLength);
return pos;\
}
下面是我画的图,非常丑,将就看
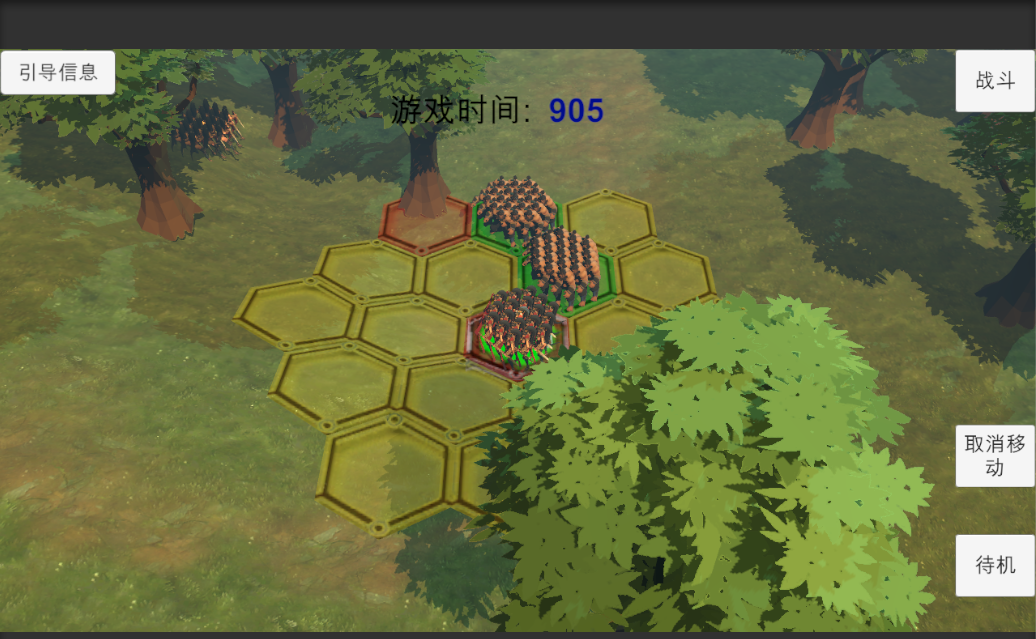
b附上测试图,已带ai移动攻击, 不过图看不到:

posted @
2020-01-03 18:09 flipcode 阅读(1444) |
评论 (0) |
编辑 收藏
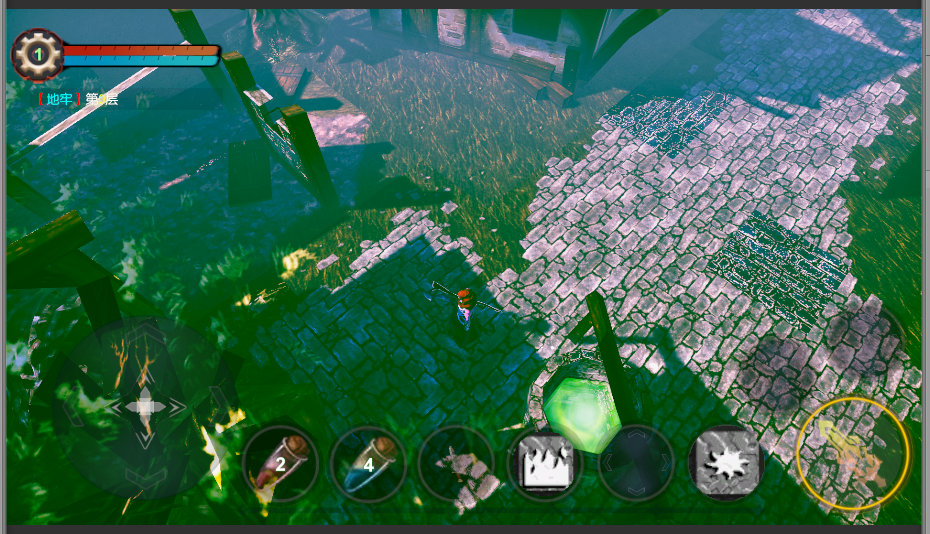
将我的u3d demo改用轻量管线来弄了下,加了点后期处理

posted @
2020-01-03 18:01 flipcode 阅读(352) |
评论 (0) |
编辑 收藏