Entity Framework是以ADO.NET为基础,面向数据的“实体框架”。以下简称EF。
它利用了抽象化数据结构的方式,将每个数据库对象都转换成应用程序对象 (entity),数据字段都转换为属性 (property),关系则转换为结合属性 (association),让数据库的 E/R 模型完全的转成对象模型,如此让程序设计师能用最熟悉的编程语言来调用访问。
个人认为百科上对EF一句比较经典的解释为:让上层的应用程序码可以如面向对象的方式般访问数据。
过去我们对数据库都是直接读取,业务数据中都是使用DataSet、DataTable等来传值,造成代码丑陋,严重脱离了OO的思想。
举个例子,当向数据库中存储时,实体框架主要是用来帮助我们把一个个对象存储到数据库中去(即通过对象与数据库“打交道”),只要把对象交给实体框架,不用自己写SQL语句,它会帮助我们自动生成SQL语句,这里生成的SQL语句通过ADO.NET发送到数据库中去,即操作数据库还是通过ADO.NET,所以本文首句说到了“EF是以ADO.NET为基础,面向数据的‘实体框架’ ”。
具体过程可以用下图表示:
如上图,假如要把内存中的两个实体Student和Teacher存储到数据库中,EF会自动将实体通过EDM的映射,将一个实体作为一条记录存入到数据库中去,那EF是如何判断哪个实体应该存到哪张表里,哪个属性应该存到哪个字段里呢?这就是映射的强大所在:
在VisualStudio中,映射通过 .edmx 文件来体现,.edmx文件的本质是一个 XML 文件,它用于定义概念模型、存储模型和这些模型之间的映射。
比如在上例的映射中,可以通过类似于如下形式来体现:
<!-- CSDL 此处表示实体 -->
<Entity Name="Student">
<Pro Name="StuName">
<Pro Name="StuSex">
<Pro Name="StuAge">
</Entity>
<!-- SSDL 此处表示数据库表 -->
<Table Name="Student">
<Col Name="StuName">
<Col Name="StuSex">
<Col Name="StuAge">
</Table>
<!-- C-S 此处表示实体与数据库表的映射关系 -->
<Relation Entity="Student" Table="Student">
<Rel ProName="StuName" ColName="StuName"> <!--实体中StuName属性对应表中StuName字段-->
<Col ProName="StuSex" ColName="StuSex">
<Col ProName="StuAge" ColName="StuAge">
</Relation>
上述代码并不是 .edmx文件中的确切格式,此处为了简单说明,读者可以看做是“伪代码”,后面将会简单介绍 .edmx 文件创建和基本格式。
通过上面可以了解到,从读代码的角度来说,EF可以使我们在不需要了解数据结构的情况下就可以很好地理解;从实现的角度来说,EF可以使存储“模型化”,就如同将很多个对象存储在一个List中似的,向数据库表里存储的都是一个个实例,从数据库中取到的也都是一个个实例。程序如此跟数据库的交互,和OO化的代码相互对应,容易“对接”。
————————————————
版权声明:本文为CSDN博主「dannyhoo6688」的原创文章,遵循CC 4.0 BY-SA版权协议,转载请附上原文出处链接及本声明。
原文链接:https://blog.csdn.net/huyuyang6688/article/details/41526763
posted @
2021-05-10 11:00 长戟十三千 阅读(280) |
评论 (0) |
编辑 收藏
命令:curl
在Linux中curl是一个利用URL规则在命令行下工作的文件传输工具,可以说是一款很强大的http命令行工具。它支持文件的上传和下载,是综合传输工具,但按传统,习惯称url为下载工具。
常见参数:
-A/--user-agent <string> 设置用户代理发送给服务器 -b/--cookie <name=string/file> cookie字符串或文件读取位置 -c/--cookie-jar <file> 操作结束后把cookie写入到这个文件中 -C/--continue-at <offset> 断点续转 -D/--dump-header <file> 把header信息写入到该文件中 -e/--referer 来源网址 -f/--fail 连接失败时不显示http错误 -o/--output 把输出写到该文件中 -O/--remote-name 把输出写到该文件中,保留远程文件的文件名 -r/--range <range> 检索来自HTTP/1.1或FTP服务器字节范围 -s/--silent 静音模式。不输出任何东西 -T/--upload-file <file> 上传文件 -u/--user <user[:password]> 设置服务器的用户和密码 -w/--write-out [format] 什么输出完成后 -x/--proxy <host[:port]> 在给定的端口上使用HTTP代理 -#/--progress-bar 进度条显示当前的传送状态
例子:
1、基本用法
# curl http://www.linux.com
执行后,www.linux.com 的html就会显示在屏幕上了
Ps:由于安装linux的时候很多时候是没有安装桌面的,也意味着没有浏览器,因此这个方法也经常用于测试一台服务器是否可以到达一个网站
2、保存访问的网页
2.1:使用linux的重定向功能保存
# curl http://www.linux.com >> linux.html
2.2:可以使用curl的内置option:-o(小写)保存网页
$ curl -o linux.html http://www.linux.com
执行完成后会显示如下界面,显示100%则表示保存成功
% Total % Received % Xferd Average Speed Time Time Time Current Dload Upload Total Spent Left Speed 100 79684 0 79684 0 0 3437k 0 --:--:-- --:--:-- --:--:-- 7781k
2.3:可以使用curl的内置option:-O(大写)保存网页中的文件
要注意这里后面的url要具体到某个文件,不然抓不下来
# curl -O http://www.linux.com/hello.sh
3、测试网页返回值
# curl -o /dev/null -s -w %{http_code} www.linux.comPs:在脚本中,这是很常见的测试网站是否正常的用法
4、指定proxy服务器以及其端口
很多时候上网需要用到代理服务器(比如是使用代理服务器上网或者因为使用curl别人网站而被别人屏蔽IP地址的时候),幸运的是curl通过使用内置option:-x来支持设置代理
# curl -x 192.168.100.100:1080 http://www.linux.com
5、cookie
有些网站是使用cookie来记录session信息。对于chrome这样的浏览器,可以轻易处理cookie信息,但在curl中只要增加相关参数也是可以很容易的处理cookie
5.1:保存http的response里面的cookie信息。内置option:-c(小写)
# curl -c cookiec.txt http://www.linux.com
执行后cookie信息就被存到了cookiec.txt里面了
5.2:保存http的response里面的header信息。内置option: -D
# curl -D cookied.txt http://www.linux.com
执行后cookie信息就被存到了cookied.txt里面了
注意:-c(小写)产生的cookie和-D里面的cookie是不一样的。
5.3:使用cookie
很多网站都是通过监视你的cookie信息来判断你是否按规矩访问他们的网站的,因此我们需要使用保存的cookie信息。内置option: -b
# curl -b cookiec.txt http://www.linux.com
6、模仿浏览器
有些网站需要使用特定的浏览器去访问他们,有些还需要使用某些特定的版本。curl内置option:-A可以让我们指定浏览器去访问网站
# curl -A "Mozilla/4.0 (compatible; MSIE 8.0; Windows NT 5.0)" http://www.linux.com
这样服务器端就会认为是使用IE8.0去访问的
7、伪造referer(盗链)
很多服务器会检查http访问的referer从而来控制访问。比如:你是先访问首页,然后再访问首页中的邮箱页面,这里访问邮箱的referer地址就是访问首页成功后的页面地址,如果服务器发现对邮箱页面访问的referer地址不是首页的地址,就断定那是个盗连了
curl中内置option:-e可以让我们设定referer
# curl -e "www.linux.com" http://mail.linux.com
这样就会让服务器其以为你是从www.linux.com点击某个链接过来的
8、下载文件
8.1:利用curl下载文件。
#使用内置option:-o(小写)
# curl -o dodo1.jpg http:www.linux.com/dodo1.JPG
#使用内置option:-O(大写)
# curl -O http://www.linux.com/dodo1.JPG
这样就会以服务器上的名称保存文件到本地
8.2:循环下载
有时候下载图片可以能是前面的部分名称是一样的,就最后的尾椎名不一样
# curl -O http://www.linux.com/dodo[1-5].JPG
这样就会把dodo1,dodo2,dodo3,dodo4,dodo5全部保存下来
8.3:下载重命名
# curl -O http://www.linux.com/{hello,bb}/dodo[1-5].JPG由于下载的hello与bb中的文件名都是dodo1,dodo2,dodo3,dodo4,dodo5。因此第二次下载的会把第一次下载的覆盖,这样就需要对文件进行重命名。
# curl -o #1_#2.JPG http://www.linux.com/{hello,bb}/dodo[1-5].JPG这样在hello/dodo1.JPG的文件下载下来就会变成hello_dodo1.JPG,其他文件依此类推,从而有效的避免了文件被覆盖
8.4:分块下载
有时候下载的东西会比较大,这个时候我们可以分段下载。使用内置option:-r
# curl -r 0-100 -o dodo1_part1.JPG http://www.linux.com/dodo1.JPG # curl -r 100-200 -o dodo1_part2.JPG http://www.linux.com/dodo1.JPG # curl -r 200- -o dodo1_part3.JPG http://www.linux.com/dodo1.JPG # cat dodo1_part* > dodo1.JPG
这样就可以查看dodo1.JPG的内容了
8.5:通过ftp下载文件
curl可以通过ftp下载文件,curl提供两种从ftp中下载的语法
# curl -O -u 用户名:密码 ftp://www.linux.com/dodo1.JPG # curl -O ftp://用户名:密码@www.linux.com/dodo1.JPG
8.6:显示下载进度条
# curl -# -O http://www.linux.com/dodo1.JPG
8.7:不会显示下载进度信息
# curl -s -O http://www.linux.com/dodo1.JPG
9、断点续传
在windows中,我们可以使用迅雷这样的软件进行断点续传。curl可以通过内置option:-C同样可以达到相同的效果
如果在下载dodo1.JPG的过程中突然掉线了,可以使用以下的方式续传
# curl -C -O http://www.linux.com/dodo1.JPG
10、上传文件
curl不仅仅可以下载文件,还可以上传文件。通过内置option:-T来实现
# curl -T dodo1.JPG -u 用户名:密码 ftp://www.linux.com/img/
这样就向ftp服务器上传了文件dodo1.JPG
11、显示抓取错误
# curl -f http://www.linux.com/error
其他参数(此处翻译为转载):

-a/--append 上传文件时,附加到目标文件 --anyauth 可以使用“任何”身份验证方法 --basic 使用HTTP基本验证 -B/--use-ascii 使用ASCII文本传输 -d/--data <data> HTTP POST方式传送数据 --data-ascii <data> 以ascii的方式post数据 --data-binary <data> 以二进制的方式post数据 --negotiate 使用HTTP身份验证 --digest 使用数字身份验证 --disable-eprt 禁止使用EPRT或LPRT --disable-epsv 禁止使用EPSV --egd-file <file> 为随机数据(SSL)设置EGD socket路径 --tcp-nodelay 使用TCP_NODELAY选项 -E/--cert <cert[:passwd]> 客户端证书文件和密码 (SSL) --cert-type <type> 证书文件类型 (DER/PEM/ENG) (SSL) --key <key> 私钥文件名 (SSL) --key-type <type> 私钥文件类型 (DER/PEM/ENG) (SSL) --pass <pass> 私钥密码 (SSL) --engine <eng> 加密引擎使用 (SSL). "--engine list" for list --cacert <file> CA证书 (SSL) --capath <directory> CA目 (made using c_rehash) to verify peer against (SSL) --ciphers <list> SSL密码 --compressed 要求返回是压缩的形势 (using deflate or gzip) --connect-timeout <seconds> 设置最大请求时间 --create-dirs 建立本地目录的目录层次结构 --crlf 上传是把LF转变成CRLF --ftp-create-dirs 如果远程目录不存在,创建远程目录 --ftp-method [multicwd/nocwd/singlecwd] 控制CWD的使用 --ftp-pasv 使用 PASV/EPSV 代替端口 --ftp-skip-pasv-ip 使用PASV的时候,忽略该IP地址 --ftp-ssl 尝试用 SSL/TLS 来进行ftp数据传输 --ftp-ssl-reqd 要求用 SSL/TLS 来进行ftp数据传输 -F/--form <name=content> 模拟http表单提交数据 -form-string <name=string> 模拟http表单提交数据 -g/--globoff 禁用网址序列和范围使用{}和[] -G/--get 以get的方式来发送数据 -h/--help 帮助 -H/--header <line> 自定义头信息传递给服务器 --ignore-content-length 忽略的HTTP头信息的长度 -i/--include 输出时包括protocol头信息 -I/--head 只显示文档信息 -j/--junk-session-cookies 读取文件时忽略session cookie --interface <interface> 使用指定网络接口/地址 --krb4 <level> 使用指定安全级别的krb4 -k/--insecure 允许不使用证书到SSL站点 -K/--config 指定的配置文件读取 -l/--list-only 列出ftp目录下的文件名称 --limit-rate <rate> 设置传输速度 --local-port<NUM> 强制使用本地端口号 -m/--max-time <seconds> 设置最大传输时间 --max-redirs <num> 设置最大读取的目录数 --max-filesize <bytes> 设置最大下载的文件总量 -M/--manual 显示全手动 -n/--netrc 从netrc文件中读取用户名和密码 --netrc-optional 使用 .netrc 或者 URL来覆盖-n --ntlm 使用 HTTP NTLM 身份验证 -N/--no-buffer 禁用缓冲输出 -p/--proxytunnel 使用HTTP代理 --proxy-anyauth 选择任一代理身份验证方法 --proxy-basic 在代理上使用基本身份验证 --proxy-digest 在代理上使用数字身份验证 --proxy-ntlm 在代理上使用ntlm身份验证 -P/--ftp-port <address> 使用端口地址,而不是使用PASV -Q/--quote <cmd> 文件传输前,发送命令到服务器 --range-file 读取(SSL)的随机文件 -R/--remote-time 在本地生成文件时,保留远程文件时间 --retry <num> 传输出现问题时,重试的次数 --retry-delay <seconds> 传输出现问题时,设置重试间隔时间 --retry-max-time <seconds> 传输出现问题时,设置最大重试时间 -S/--show-error 显示错误 --socks4 <host[:port]> 用socks4代理给定主机和端口 --socks5 <host[:port]> 用socks5代理给定主机和端口 -t/--telnet-option <OPT=val> Telnet选项设置 --trace <file> 对指定文件进行debug --trace-ascii <file> Like --跟踪但没有hex输出 --trace-time 跟踪/详细输出时,添加时间戳 --url <URL> Spet URL to work with -U/--proxy-user <user[:password]> 设置代理用户名和密码 -V/--version 显示版本信息 -X/--request <command> 指定什么命令 -y/--speed-time 放弃限速所要的时间。默认为30 -Y/--speed-limit 停止传输速度的限制,速度时间'秒 -z/--time-cond 传送时间设置 -0/--http1.0 使用HTTP 1.0 -1/--tlsv1 使用TLSv1(SSL) -2/--sslv2 使用SSLv2的(SSL) -3/--sslv3 使用的SSLv3(SSL) --3p-quote like -Q for the source URL for 3rd party transfer --3p-url 使用url,进行第三方传送 --3p-user 使用用户名和密码,进行第三方传送 -4/--ipv4 使用IP4 -6/--ipv6 使用IP6转自:http://www.linuxdiyf.com/linux/2800.html
posted @
2021-04-15 10:37 长戟十三千 阅读(203) |
评论 (0) |
编辑 收藏

这样一个6边形网格地图,有没有公式计算两个格子间的距离呢?
比如(0,0)走到(1,1)需要走几步,我们看图可以发现走两步就行了,但是有公式可以计算就更好了。
下面跟群里的小伙伴讨论之后的出的结果。
我们需要借助三维坐标

像这样的坐标体系,有x,y,z三个维度,x,y,z的和始终是0,我们称之为cube坐标,距离计算公式是
distance=(abs(cubePos1.x-cubePos2.x)+abs(cubePos1.y-cubePos2.y)+abs(cubePos1.z-cubePos2.z))/2
或者
diatance=max(cubePos1.x-cubePos2.x)+abs(cubePos1.y-cubePos2.y)+abs(cubePos1.z-cubePos2.z))
上面两个公式都能算出距离,至于具体原理我就不懂了,反正可以这么用
然后要做的就是把二维坐标转成三维坐标
其实很简单
我们原来的坐标是这样的
0,0 --- 1,0 --- 2,0 --- 3,0
--- 0,1 --- 1,1 --- 2,1 --- 2,2
0,2 --- 1,2 --- 2,2 --- 3,2
--- 0,3 --- 1,3 --- 2,3 --- 3,3
如果调整成这样
0,0 --- 1,0 --- 2,0 --- 3,0
--- 0,1 --- 1,1 --- 2,1 --- 3,1
--- --- 0,2 --- 1,2 --- 2,2 --- 3,2
--- --- --- 0,3 --- 1,3 --- 2,3 --- 3,3
这样二维中的x,y就对应了三维中的x,y。至于三维的z,因为x,y,z的和始终是0,只要z=-x-y就行了
调整过程其实就是x=x-int(y/2)
最终我们得到二维坐标转三维坐标的函数
func getCubePosFromPos(pos): var x=pos.x-int(pos.y)/2 var y=pos.y var z=-x-y return Vector3(x,y,z)
计算距离的函数
func posDistance(pos1,pos2): var cubePos1=getCubePosFromPos(pos1) var cubePos2=getCubePosFromPos(pos2) var distance=(abs(cubePos1.x-cubePos2.x)+abs(cubePos1.y-cubePos2.y)+abs(cubePos1.z-cubePos2.z))/ 2 return distance
把这个公式放到游戏中试验下

黑色小圆圈里的数字表示这个格子到主角的距离,计算很准确
顺便说下从三维坐标转回到二维坐标的算法
func getPosFromCubePos(cubePos): var y=cubePos.y var x=cubePos.x+int(y)/2 return Vector2(x,y)
参考资料
https://www.redblobgames.com/grids/hexagons/
posted @
2021-03-25 12:20 长戟十三千 阅读(726) |
评论 (0) |
编辑 收藏
今天使用yum 安装了一个软件,后来没有找到路径
1、首先安装一个redis
[root@iZbp1eem925ojwyx17ao9kZ ~]# yum install redis
1
2、查找redis的安装包
[root@iZbp1eem925ojwyx17ao9kZ ~]# rpm -qa|grep redis
redis-3.2.10-2.el7.x86_64
[root@iZbp1eem925ojwyx17ao9kZ ~]#
1
2
3
3、查找安装包的安装路径
[root@iZbp1eem925ojwyx17ao9kZ ~]# rpm -ql redis-3.2.10-2.el7.x86_64
/etc/logrotate.d/redis
/etc/redis-sentinel.conf
/etc/redis.conf
/etc/systemd/system/redis-sentinel.service.d
/etc/systemd/system/redis-sentinel.service.d/limit.conf
/etc/systemd/system/redis.service.d
/etc/systemd/system/redis.service.d/limit.conf
/usr/bin/redis-benchmark
/usr/bin/redis-check-aof
/usr/bin/redis-check-rdb
/usr/bin/redis-cli
1
2
3
4
5
6
7
8
9
10
11
12
4、ok,现在就找到了!
————————————————
版权声明:本文为CSDN博主「向小凯同学学习」的原创文章,遵循CC 4.0 BY-SA版权协议,转载请附上原文出处链接及本声明。
原文链接:https://blog.csdn.net/wd2014610/article/details/79659073
posted @
2021-03-08 19:55 长戟十三千 阅读(259) |
评论 (0) |
编辑 收藏
一、概述
在从 CentOS 6 迁移到 CentOS 7 的过程中,可能有一些地方需要调整,最显著的地方莫过于 systemd 带来的改变,不同的管理服务的方式,不同的日志方式,设置时区,时间等等。 当然,除了这些显而易见的改变之外,有些变化并不是那么引人注目,例如这里要介绍的你可能发现曾经配置了正确的 /etc/security/limits.conf 在 CentOS 7 中却没有生效了。
如果遇到上面的问题,很可能已经导致了你的应用异常了,例如:以前配置了服务的 nproc 为一个非常大的数值, 结果现在发现服务不能打开更多的文件。
惊讶之余,查看服务的 /proc/<pid>/limits 却发现:
1 Max open files 1024 1024 files
那么,为什么服务使用 systemd 启动就没有生效呢?
根据 redhat bugzilla 754285, systemd 实际上是会忽略 /etc/security/limits.conf,下面是 systemd 2 号人物的回答:
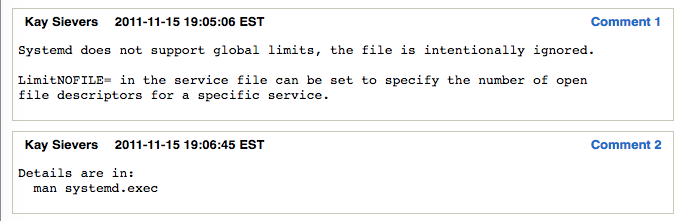
而这个 bug 也标记为已解决,在 pam 包中解决,这个包包含了 /etc/security/limits.conf, 在这个文件中加入了如下注释:
# /etc/security/limits.conf # #This file sets the resource limits for the users logged in via PAM. #It does not affect resource limits of the system services. #
注意,这里的 system services 指的是 system wide service,对于 CentOS 7 来说也就是系统的 service。
systemd 还可以对普通用户启动,使用 --user 参数。
二、解决之道
在CentOS 7 / RHEL 7的系统中,使用Systemd替代了之前的SysV,因此 /etc/security/limits.conf 文件的配置作用域缩小了一些。limits.conf这里的配置,只适用于通过PAM认证登录用户的资源限制,它对systemd的service的资源限制不生效。登录用户的限制,与上面讲的一样,通过 /etc/security/limits.conf 和 limits.d 来配置即可。
对于systemd service的资源限制,如何配置呢?
全局的配置,放在文件 /etc/systemd/system.conf 和 /etc/systemd/user.conf。 同时,也会加载两个对应的目录中的所有.conf文件 /etc/systemd/system.conf.d/*.conf 和 /etc/systemd/user.conf.d/*.conf
其中,system.conf 是系统实例使用的,user.conf用户实例使用的。一般的sevice,使用system.conf中的配置即可。systemd.conf.d/*.conf中配置会覆盖system.conf。
1 DefaultLimitCORE=infinity 2 DefaultLimitNOFILE=100000 3 DefaultLimitNPROC=100000
然后运行如下命令,才能生效。
1 sudo systemctl daemon-reload 2 sudo systemctl restart nginx.service
查看一个进程的limit设置:cat /proc/YOUR-PID/limits
例如我的一个nginx service的配置效果:
1 $cat /proc/$(cat /var/run/nginx.pid)/limits 2 Limit Soft Limit Hard Limit Units 3 Max cpu time unlimited unlimited seconds 4 Max file size unlimited unlimited bytes 5 Max data size unlimited unlimited bytes 6 Max stack size 8388608 unlimited bytes 7 Max core file size unlimited unlimited bytes 8 Max resident set unlimited unlimited bytes 9 Max processes 100000 100000 processes 10 Max open files 100000 100000 files 11 Max locked memory 65536 65536 bytes 12 Max address space unlimited unlimited bytes 13 Max file locks unlimited unlimited locks 14 Max pending signals 1030606 1030606 signals 15 Max msgqueue size 819200 819200 bytes 16 Max nice priority 0 0 17 Max realtime priority 0 0 18 Max realtime timeout unlimited unlimited us
顺便提一下,我还被CentOS7自带的/etc/security/limits.d/20-nproc.conf文件坑过,里面默认设置了非root用户的最大进程数为4096,难怪我上次在limits.conf中设置了没啥效果,原来被limit.d目录中的配置覆盖了。
posted @
2021-03-01 20:30 长戟十三千 阅读(418) |
评论 (0) |
编辑 收藏
c_cpp_properties.json:
{
"configurations": [
{
"name": "Linux",
"includePath": [
"${workspaceFolder}/service/include",
"${workspaceFolder}/service/src/swift",
"${workspaceFolder}/service/src/resource",
"${workspaceFolder}/service/src/frame",
"${workspaceFolder}/service/src/database",
"${workspaceFolder}/service/src/oss",
"${workspaceFolder}/service/src/tss",
"${workspaceFolder}/service/src/gamesvr",
"${workspaceFolder}/**"
],
"defines": [],
"compilerPath": "/usr/lib64/ccache/clang",
"cStandard": "c99",
"cppStandard": "c++14",
"intelliSenseMode": "linux-clang-x64"
}
],
"version": 4
}
launch.json:
{
"version": "0.2.0",
"configurations": [
{
"name": "attach gamesvr",
"type": "cppdbg",
"request": "attach",
"program": "${workspaceFolder}/service/home/gamesvr/bin/gamesvr",
"processId": "${command:pickProcess}",
"MIMode": "gdb",
"setupCommands": [
{
"description": "Enable pretty-printing for gdb",
"text": "-enable-pretty-printing",
"ignoreFailures": true
}
]
}
]
}
settings.json
{ "files.associations": { "hash_map": "cpp", "hash_set": "cpp", "bitset": "cpp", "chrono": "cpp", "algorithm": "cpp", "hashtable": "cpp", "typeinfo": "cpp", "typeindex": "cpp", "functional": "cpp", "cctype": "cpp", "clocale": "cpp", "cmath": "cpp", "csetjmp": "cpp", "cstdarg": "cpp", "cstddef": "cpp", "cstdio": "cpp", "cstdlib": "cpp", "cstring": "cpp", "ctime": "cpp", "cwchar": "cpp", "cwctype": "cpp", "strstream": "cpp", "*.tcc": "cpp", "complex": "cpp", "condition_variable": "cpp", "deque": "cpp", "list": "cpp", "unordered_map": "cpp", "unordered_set": "cpp", "vector": "cpp", "exception": "cpp", "fstream": "cpp", "initializer_list": "cpp", "iomanip": "cpp", "iosfwd": "cpp", "iostream": "cpp", "istream": "cpp", "limits": "cpp", "mutex": "cpp", "new": "cpp", "ostream": "cpp", "numeric": "cpp", "ratio": "cpp", "sstream": "cpp", "stdexcept": "cpp", "streambuf": "cpp", "system_error": "cpp", "thread": "cpp", "tuple": "cpp", "type_traits": "cpp", "array": "cpp", "cfenv": "cpp", "cinttypes": "cpp", "cstdint": "cpp", "random": "cpp", "regex": "cpp", "utility": "cpp", "atomic": "cpp", "string": "cpp" }, "files.watcherExclude": {
"**/*.d": true,
"**/*.o": true,
"**/*.a": true,
"**/*.log": true,
"**/service/src/tconnd/**": true,
"**/service/src/stresstest/**": true,
"**/service/home/**": true,
"**/service/tools/**": true,
"**/service/lib/**": true,
"**/BattleSystem/BattleClient/**": true
},
"files.exclude": {
},
"search.exclude": {
"**/service/home/**": true,
"**/service/tools/**": true,
"**/service/lib/**": true,
"**/BattleSystem/BattleClient/**": true
},
"C_Cpp.errorSquiggles": "Disabled",
"editor.minimap.enabled": false,
} tasks.json
{
"tasks": [
{
"label": "rebuild",
"type": "shell",
"command": "${workspaceFolder}/service/src/release_make.sh",
"group": {
"kind": "build",
"isDefault": true
}
},
{
"label": "start",
"type": "shell",
"command": "${workspaceFolder}/service/home/restart.sh",
"group": {
"kind": "build",
"isDefault": true
}
},
],
"version": "2.0.0"
}
posted @
2021-01-27 17:37 长戟十三千 阅读(386) |
评论 (0) |
编辑 收藏
centos7安装distcc
依赖项:
安装g++
yum install -y gcc
yum install -y gcc-c++
python:
python3.1版本以上。
yum install -y python36
python环境
安装python3-devel, distcc安装时候需要其中的依赖
yum install -y python3-devel
安装libbinutils 库 distcc需要依赖
yum install -y binutils-devel
下载distcc包
https://distcc.github.io/
下载最新的安装包就好,我用的是distcc3.3.3
1 tar -xvf distcc-3.3.3.tar.gz
2 cd distcc-3.3.3
3 ./configure 如果报错Cannot find libiberty。需要安装libbinutils 库
4 make 如果报错,应该是上面的安装依赖项没安装全
5 make install
6 ln -s ./distcc-3.3.3/distcc /usr/lib/distcc
配置:
vim ~/.bashrc
export DISTCC_HOSTS="localhost"
export DISTCC_POTENTIAL_HOSTS="localhost"
export DISTCC_LOG="./distcc.log" #编译日志
意外:如果以上都配置好了,还是连不上,关掉防火墙,重试
systemctl stop firewall
安装ccache
yum install -y ccache
vim ~/.bash_profile
PATH=/usr/lib/ccache/bin:$PATH:$HOME/bin
开启指令
distccd --daemon --allow 192.168.0.0/8 --user nobody --enable-tcp-insecure
posted @
2021-01-19 10:20 长戟十三千 阅读(1449) |
评论 (0) |
编辑 收藏
摘要: 1. 为什么要使用后缀名为 .d 的依赖文件?在 Makefile 中, 目标文件的依赖关系需要包含一系列的头文件。比如main.c 源文件内容如下:#include "stdio.h" #include "defs.h" int main(int argc, char *argv[]) { printf("Hello, %s!\n", NAME); return 0; } 12345...
阅读全文
posted @
2020-12-29 19:24 长戟十三千 阅读(502) |
评论 (0) |
编辑 收藏
1. 在 CentOS 7 上安装 .NET Core 运行时
- 在安装. net之前,您需要注册Microsoft密钥、注册产品存储库并安装所需的依赖项。这只需要在每台机器上执行一次。
sudo rpm -Uvh https://packages.microsoft.com/config/centos/7/packages-microsoft-prod.rpm
sudo yum update sudo yum install aspnetcore-runtime-3.0
如果要安装 .NET SDK,使用 sudo yum install dotnet-sdk-3.0 这个命令。
如果运行该命令,打印出关于如何使用dotnet的信息,就可以开始了。
2. 准备一个 .NET Core 3 的 Web 应用
编辑一个 .NET Core 3 的 Web 应用
3. 发布程序
右键项目,选择发布,一步一步操作即可,目标运行时选择 linux-x64。
使用的 VS 2019
4. 发布的程序上传到 CentOS 服务器上
- cd 到指定目录
- 运行 dotnet 项目.dll 或者 nohup dotnet 项目.dll
- 访问网站,能够看到网站已经能够访问
查看防火墙状态:systemctl status firewalld
查询指定端口是否开启:firewalld-cmd --query-port=80/tcp
开启防火墙:systemctl start firewalld
关闭防火墙:systemctl stop firewalld
5. 安装 Nginx
6. 配置 Nginx 代理
- 定位到 nginx 配置文件目录
- 编辑配置文件
如下
location / { proxy_pass http://localhost:5000; }
将请求映射到本地请求的 5000 端口上。
- 如果报错 13: Permission denied while connecting to upstream 之类的错误,参考:https://www.cnblogs.com/songxingzhu/p/10063043.html
setsebool -P httpd_can_network_connect 1
7. 安装 Supervisor
8. 使用 Supervisor 配置守护进程
在 /etc/supervisor/conf.d/ 下创建 sampleDemo.ini 文件
sampleDemo.ini 配置文件如下
[program:SampleDemo] ;程序名称 command=dotnet WebUI.dll ;需要执行的命令 directory=/usr/local/dotnetCore3/sampleDemo ;命令执行的目录 environment=ASPNETCORE__ENVIRONMENT=Production ;环境变量 user=root ;用户 stopsignal=INT ;当请求停止时用来终止程序的信号。这可以是任何术语,HUP, INT, QUIT, KILL, USR1或USR2。 autostart=true ;是否自启动 autorestart=true ;是否自动重启 startsecs=10 ;自动重启时间间隔(s) stderr_logfile=/var/log/sampleDemo/err.log ;错误日志文件 stdout_logfile=/var/log/sampleDemo/out.log ;输出日志文件
http://www.supervisord.org/configuration.html#program-x-section-settings
重启:supervisorctl reload
访问 Supervisor Web 管理器,可以实现对部署程序的启动、停止、重启等操作。
作者:一青叶
链接:https://www.jianshu.com/p/88662513c69b
来源:简书
著作权归作者所有。商业转载请联系作者获得授权,非商业转载请注明出处。
posted @
2020-12-28 17:45 长戟十三千 阅读(498) |
评论 (0) |
编辑 收藏
1、p4 client my_workspace
修改view,配置myclient
2、/data/mydir/ 目录下创建 .p4config文件,添加内容:
P4USER=myuser
P4CLIENT=myclient
3、vim ~/.bashrc, 添加
export P4USER=myuser
export P4PORT=10.8.7.9:666
export P4CONFIG=.p4config
export P4IGNORE=.p4ignore
4、source ~/.bashrc
5、p4 set
6、p4 sync ./...
posted @
2020-11-25 15:19 长戟十三千 阅读(1085) |
评论 (0) |
编辑 收藏